Showing posts with label custom. Show all posts

Thursday, December 7, 2017

[WIP] MG Nu Ver. Ka X LED WIP 4

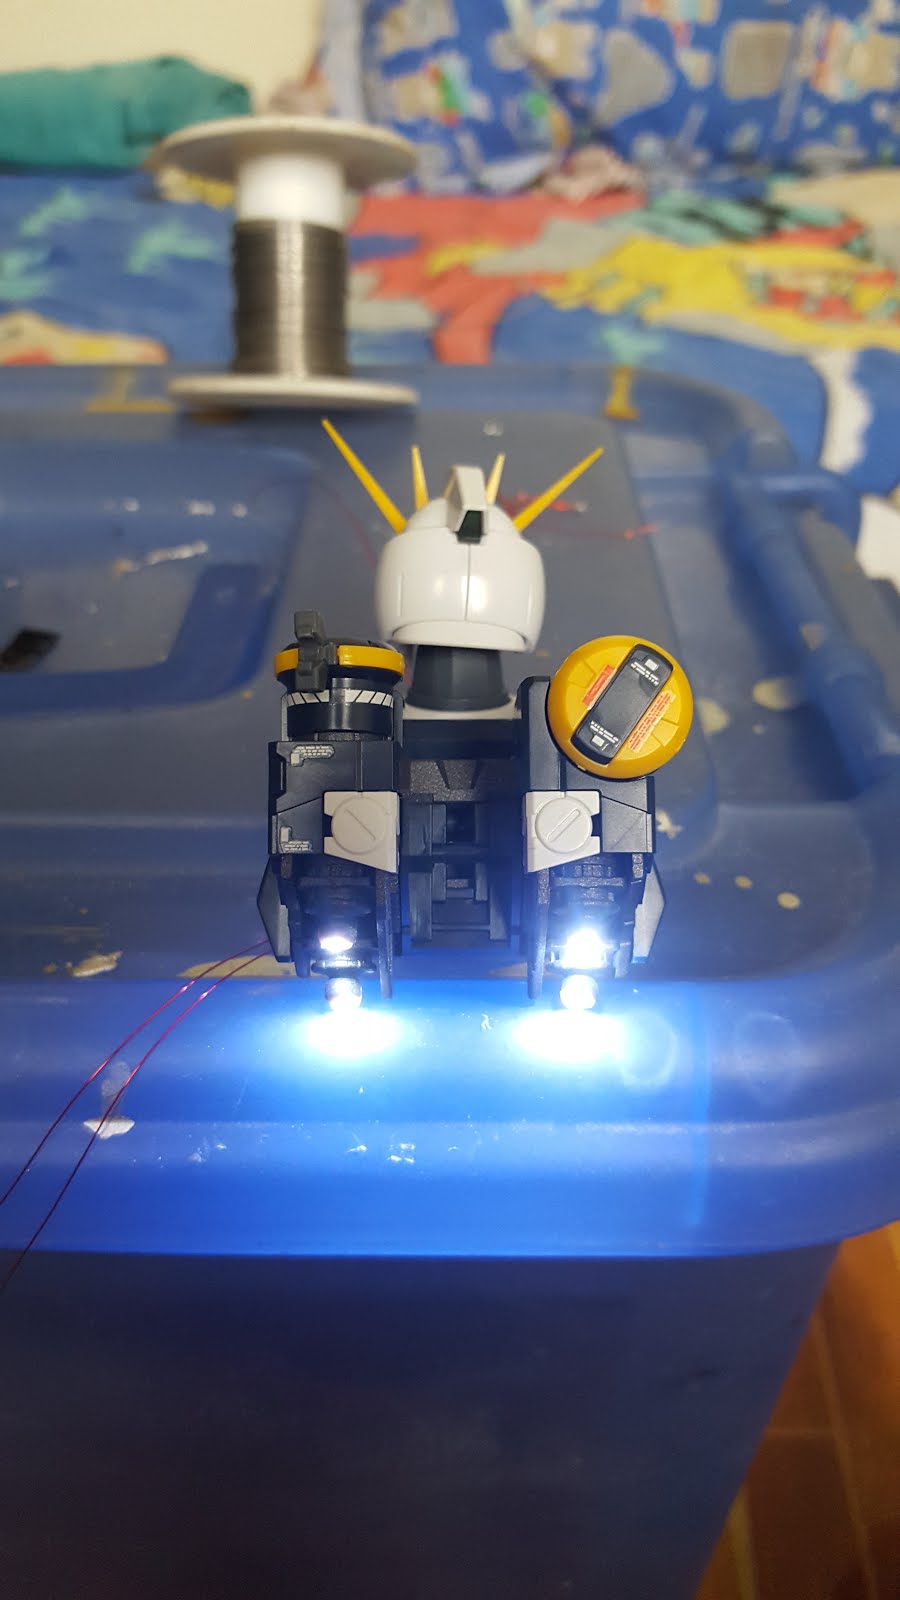
Next up would be the main body.


Good thing the kit is designed in a way that lets me remove and install the armor pieces without disassembling the inner frame. That way I can finish wiring this kit first, then paint the armor parts.


I forgot to mention that I've actually already painted the inner frame before doing the LED mods. I used a custom mix of Zurc gunmetal for this. I say custom mix since it's just regular Zurc gunmetal mixed with either pearl white or metallic black to get the shade I wanted.

Since I'm almost already done with the LED mods, I've started on painting the armor parts.


I'm using Zurc paints here. The white is pearl white, the blue is Zurc's "Exia Blue", I actually wanted a darker shade simillar to the original color but I really like the finish so I'm going along with it.

The two-tone whites were done by first spraying a layer of primer gray on the desired parts then spraying pearl white all over the piece. 

I'm still undecided on modding the fin funnels. I want them lit up if I'm going to do some dynamic posing but if they're just going to be placed at the back then I don't see any reason to light them up.

[WIP] MG Nu Ver. Ka X LED WIP 3

Continuing where I left, I started working on the lower body.


The feet was one of the simplest parts to do. but since the clear part goes around the feet. I had to put 2 LEDs on each side for it to be lit properly.

The legs would be the hardest part since it's built with lots of layered and interlocking parts. Not to mention there are moving pieces for the psycho-frame gimmick. 

I wouldn't try explaining it here in detail because that will be really hard. But hopefully you get some idea with the pics here.


Tuesday, December 5, 2017

[WIP] MG Nu Ver. Ka X LED WIP 2

On to the harder parts of the project.
One thing about this kit is the complicated joint mechanism on the elbows. 


For the elbow joint, the best that I could think of was to go around it instead of embedding the wires within the joint. 


For the shoulders, I had to use 3 LEDs just to spread the light evenly across the clear part. The 0603 SMD LEDs' size really help in embedding the LEDs into the parts. The downsize would be that it only illuminates a smaller area. 

[WIP] MG Nu Ver. Ka X LED WIP 1

So I scrapped my previous MG Nu ver.Ka project and started a new one.

My last MG Nu ver.Ka was ages ago and I've learned quite a lot since then. My WIP posts from that time are still here so we can compare what's changed and new with this one.

One notable difference would be the 0603 SMD LEDs and the 30AWG magnet wires I'll be using for this project.


Since the head is actually designed to be lit, everything in this part makes my work a bit easier. In the end, I decided to put the LED onto the neck piece so I can maximize the space originally designed for the LED module. plus this way, the head can still be removed for whatever reason necessary.


Next up would be the backpack. I think this would be one of the simplest parts of this project to work on. Wiring was pretty straightforward since there was plenty of space on the backpack part.


Monday, February 27, 2017

[WIP] MG Phenex WIP 4

Here's some update regarding the MG Phenex. Last time, I've already started working on one of the Armed armor DE's. So it's just a continuation of that.


Since I've already worked on one of the shields, wiring the other one was a bit easier and neater. The wiring on the shields was not my best work but since I've already finished one shield for quite some time, I had to do the same wiring to the other. Disassembly was out of the options since I run the risk of breaking parts if I force the disassembly. At leased I get some pretty satisfying results.


Now that I've finished working on both shields, it's time to connect them to the main body.


I've already left out some excess wire in preparation for the shields when I was building the main body. I waned the shields to be removable for storage purposes but that would make hiding the wiring very difficult. So some sacrifice had to be made. At least this area is at the back and isn't very visible due to the large shields.


It's still not finished as I have yet to do the clear eyes. I'm also curious to see how it'll look like with decals on. Until next time.

Monday, January 9, 2017

[WIP] MG Strike Freedom Gundam WIP 2

After all the happenings during the holidays and the busy work-life stuff out of the way, I've finally managed to get as much done enough for a blog update. 


It's been a long time since my last update so it's a good thing that I managed to do quite a lot in this project that it's almost nearing completion.

Backtracking to where I stopped from the last update, I continued painting the various parts while wiring up the frame.


I actually sawed slits in the chest vents to add to the light effects.


I was actually waiting for my ordered 1.8mm LEDs to arrive for use in the backpack but decided that the 0603 smd LEDs could still work. And they do work quite well.


Also, lighting up the head required 2 0603 smd LEDs to light up both the eyes and the forehead sensor. I could have used a different LED but I'm currently running low on my supply of LEDs since my order hasn't arrived yet.


I've also wanted to light up some sections of the wings to give the back view a better look.


Trying to hide the wiring as much as I can was a pain since I had to work with small pieces and pass the wires through some moving mechanisms.

Once I've finished painting enough major pieces, it's time to start putting them together.


Luckily the waist area has enough space to pass the wiring. It only needed minimal drilling to get the wires around.


And now the main body is put together and the wiring combines.


After the main body, it's time to put the backpack on. The backpack had the most LEDs in the kit. Good thing there where enough space in the areas we needed to handle all the wiring.


Once all the wires parts are put together, it's really good to see them all lit up. 

I noticed that some of the wing tips have lesser light than the others. This could be due to the LED coming from a different source/ batch than the other LEDs. It just sucks that they aren't noticeable during initial test but look a bit too obvious when seen with the other parts. If it gets to me I may try replacing those once I get to restock my LEDs.


I originally planned to have this displayed with the wings opened. Unfortunately I may have under estimated the placement of the holes in some moving sections of the wings as that is as much as I can open them. I guess I'll have to find another pose for this.

With all the LED wiring done and most of the kit assembled, I'll just have to finish painting a few minor parts then some panel lining and decals will finally complete this project.

Welcome

Welcome to MechTalyer. My personal space for everything Gunpla.

Search

Popular Posts

Followers

Categories

1/100 (5) 100 (7) 144 (10) 2017 (4) air compressor (2) airbrush (6) amazing red warrior (2) anubis (1) avalanche (1) bandai (9) barbatos (1) base (5) blog (1) bsc (1) community (2) completed (1) conversion (2) custom (18) daban (3) decals (1) destiny (1) display (7) dragon momoko (10) event (1) exia (4) expo (2) flying base r (1) geirail (1) GMKC (2) guide (1) gundam (21) gunpla (24) gunpla builders den (2) haro (1) hazel custom (1) hg (8) hobby (11) IBO (1) jesta cannon (1) kamil (30) kotobukiya (1) led (38) led unit (1) magic toys (1) master grade (11) meetup (1) metal build (5) MG (25) mod (25) monoeye (1) nu (4) others (2) paint (7) pearl gloss (1) peg (1) phenex (4) philippines (4) qan[t] (2) random (7) review (15) RG (6) rx78 (2) setup (1) shia (2) sinanju (1) site (1) star build strike (2) stickers (1) strike freedom (8) tthongli (2) tutorial (6) unicorn (5) upgrade (1) vintage (2) wing expansion effect (1) wing zero custom (1) wip (36) zaku (2) zaku 2 (3)

Statistics

Powered by Blogger.