Showing posts with label metal build. Show all posts

Wednesday, April 12, 2017

[WIP] Dragon Momoko MG Strike Freedom MB ver. WIP 4

As far as this project goes, all that's left for this is putting everything together. Plus some minor details.

Continuing working on the main body, I just finished putting together some minor parts like the skirts and some weapons.


Though I've already started working on the backpack way before, I haven't finished it yet because of the problem with the main backpack.

Because of how the backpack is designed, just putting LEDs on the main thrusters will make the LEDs out of place.


To fix this issue, I glued some thrusters into the existing parts to hide and blend the LEDs into the piece. I used some thrusters from some scrap HG kits I have.

I also wanted to light up the wing effect parts for maximum effect.


My first test was to do the same process I did with the MG Star Build Strike Plavsky Wings.


Unfortunately, I didn't like the effect so instead, I just placed several LEDs around the piece.


I made the main ms, backpack and effect parts detachable for easy storage and transportation. That mean some wiring will have to be exposed.


Now that this project's fully finished, all that's left is to do a proper photo shoot of this.

This has to be my best work as of now. I've learned a lot on this project. Not just LED mods but also a lot of painting went into this project. I know I still have a lot to learn and I'll have to work harder on future projects.

Monday, March 13, 2017

[WIP] Dragon Momoko MG Strike Freedom MB ver. WIP 3

Finally had some time to continue working on this. Much of the work done on this kit recently was just painting the details specially the inner frame and armor color separation. 


Although this is not my first time painting a project. This is my first when it comes to detail masking and painting. Most of the color separation in the armor pieces had to be painted so this serves as a good exercise for my masking skills.

My masking is far from perfect since I still get a few errors but good thing they're easily fixable.

And now that I've got most of the pieces done, I can finally assemble some parts.


I finished painting the legs so I finally got to assemble it. good thing all the different colors' shades match.


One thing to note here during assemble is the hip joints. It's just too tight. Though I've managed to push the joints into the waist section, It's too tight that it's almost stuck and trying to move it might break the hip joint. I won't try removing the joint anymore since I might break it but to re-position the joint, I use long nose pliers to adjust the joint. I guess I'll just put this in a fixed pose and not move it.


I think I've already painting most of the major pieces that I'll be able to partly assemble the whole body of the kit. Whenever I finish/start working on a section of the kit, I always test the wiring to make sure they don't get stuck or broken specially in the joint/articulation areas.


Now the upper body is put together, along with most of the armor pieces. 


I've already finished working on the head previously so it's time to put it in the body. Though I find the light in the forehead a bit too bright so I'll still have to fix that.


I have also previously finished working on the shoulder verniers so now I get to assemble it and wire it up with the other sections.


For the time it took to get this far, I'm very satisfied with what I've got at this point. Going slow and careful really paid off in this project since I haven't get much issues until now and thanks to the time spent planning the process beforehand, I get to have a clear idea of what I need to do next.

As much as I've done now up to this point, I don't see this project being completed anytime soon. Like I've said earlier, I'm taking my time with this and there's still a lot to be done. I'm taking this project slowly but surely to make sure I don't make mistakes and mess this up. Hopefully I get to finish the remaining parts of the body soon.

Thursday, February 2, 2017

[WIP] Dragon Momoko MG Strike Freedom MB ver. WIP 2

For this project, I decided to start working on the backpack first since it's what I think that had the less amount of details to be painted. And also because most of the lighting would be on the backpack anyway.


My masking skills will be tested with this project. Lots of small bits of detail that needs to be painted but once done really makes the piece look good.

The gold details are painted similar to the inner frame for consistency and uniformity, Zurc hyper silver then Tamiya clear yellow. While the other details are just a combination of my paints to get the desired shade.


Unlike what I did with my 1st MG Strike Freedom project, I'll just simplify the wiring for the wings. Although this  doesn't have the complex gimmick the Bandai kit has, avoiding the joints would help the joints and the wires from breaking easily and the joints' range of movement will not be obstructed.


Unfortunately, the backpack's main thrusters are molded in a different color which is not translucent.  I'm still thinking on ways to work on this. I'm currently considering recasting the parts in clear resin or just drill holes in the thrusters. I'm taking my time planning this so that I can execute this properly.


Moving on to other areas, I'm also working on the head, starting with painting the eye sensors. It would have been easier to just hand paint the black area around the eyes but here I used an airbrush to do multiple thin coats. Airbrushing dries the paint faster, gives a cleaner more even look, and it's easier to clean up because of the thin coats.


I've also started working on the legs of the kit. Good thing there were enough space inside the legs to pass the wire through without needing too much modification on the parts.

This kit still needs a lot to be worked on. Mostly masking and painting the color separation and other details. Hopefully next time I would have already painted a lot more details.

Tuesday, January 24, 2017

[WIP] Dragon Momoko MG Strike Freedom MB ver. WIP 1


Since most of my ongoing projects are on their final stages. I went ahead and started working on this.


Based from the unboxing review of the kit, most of the parts are under-gated, which is a good thing. 


Since most of the parts are under-gated, I decided to start painting them while still attached to runners. This makes painting similar colored parts easier since they are all still grouped together. This also helps me not to loose any parts before assembly.


Unfortunately, there isn't much part separation for most of the small details, Which means there will be a lot of masking and painting for the small details.


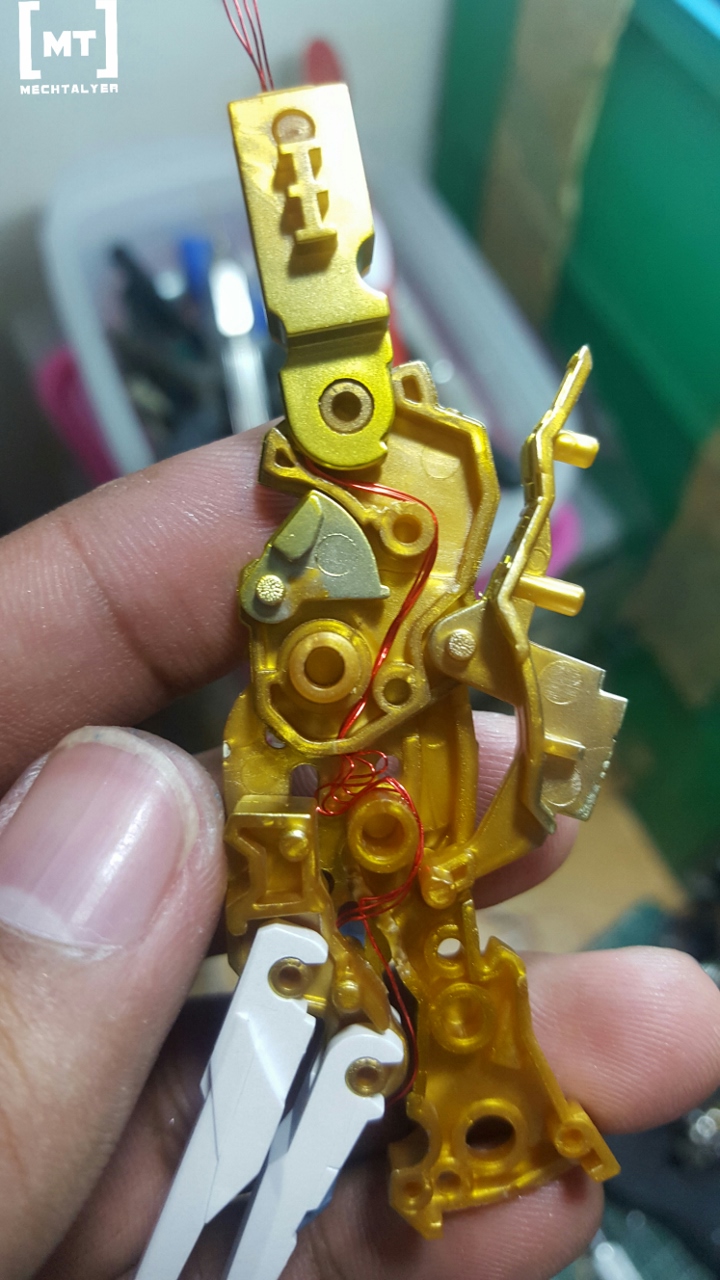
Since majority of the parts are painted, I've already started wring some of the parts, mainly the verniers throughout the kit. I'm still planning on adding lights in a few other places depending on how they will look on the final result.


One of the most notable "issue" with this kit is the gold color of the inner frame. A lot of people actually preferred Daban's plated gold but then there's the issue with nub marks.

Good thing there's Zurc Hobby Paints. They're a local custom paint supplier. I got to try one of their latest paints which is the hyper silver and I'm very impressed with the result. It's still far from the chrome plated look but really shiny silver right off the bottle. No sanding. No priming. No gloss undercoat. Just straight airbrushed and considering my beginner airbrushing skills and my DIY airbrush setup, I'm getting really satisfying results.


Here's some tests for the gold inner frame. The hand was painted with a light coat of Zurc's gold paint compared to a piece of the MG Phenex. It has that Matte gold finish similar to the MG Hyaku Shiki 2.0. It really looks good on pics but it's too light for my taste specially when seen in person.


Instead of laying gold paint over the silver, I tried clear yellow and I'm really liking the result. The brightness of the silver still pops out under the clear paint, almost giving it the plated look at a lesser degree. 

Hopefully by the next update I've finished working on the wiring and painting the inner frame. I expect that masking and detailing will take the most time so I'll try doing them bit by bit.

This kit will have a lot going and I'm not planning on finishing this any time soon. I'll be taking my time working on this so as not to mess anything up. This will test everything I know and can do in building Gunpla. And this will also be a good opportunity to learn and apply new things.

Welcome

Welcome to MechTalyer. My personal space for everything Gunpla.

Search

Popular Posts

Followers

Categories

1/100 (5) 100 (7) 144 (10) 2017 (4) air compressor (2) airbrush (6) amazing red warrior (2) anubis (1) avalanche (1) bandai (9) barbatos (1) base (5) blog (1) bsc (1) community (2) completed (1) conversion (2) custom (18) daban (3) decals (1) destiny (1) display (7) dragon momoko (10) event (1) exia (4) expo (2) flying base r (1) geirail (1) GMKC (2) guide (1) gundam (21) gunpla (24) gunpla builders den (2) haro (1) hazel custom (1) hg (8) hobby (11) IBO (1) jesta cannon (1) kamil (30) kotobukiya (1) led (38) led unit (1) magic toys (1) master grade (11) meetup (1) metal build (5) MG (25) mod (25) monoeye (1) nu (4) others (2) paint (7) pearl gloss (1) peg (1) phenex (4) philippines (4) qan[t] (2) random (7) review (15) RG (6) rx78 (2) setup (1) shia (2) sinanju (1) site (1) star build strike (2) stickers (1) strike freedom (8) tthongli (2) tutorial (6) unicorn (5) upgrade (1) vintage (2) wing expansion effect (1) wing zero custom (1) wip (36) zaku (2) zaku 2 (3)

Statistics

Powered by Blogger.