Monday, January 30, 2017

[RANDOM] Toy Photographer Wannabe

Been down with some cough and colds this past week. Literally slept the whole weekend off so I didn't get to work on anything. 

Now I'm feeling a bit better but still not up to going back to sniffing paint or soldering lead. So instead I tried to do some toy photography with my kits.

Damn... Cameras really do add 10 lbs. :P


The setup. Don't have any fancy equipment. But my laptop hooked to my tv for the background works just as well. Also I can easily change backgrounds as fast as my internet loads them. :P Also I'm using just my phone, a Samsung S6 as the camera, set to auto. :P The kits I used here are the RG Sinanju ans HG Unicorn Destroy Mode.


Those are some of the best shots I got. It's was hard to get a good shot of the Sinanju specially when I want to focus on its thrusters (because whats the point of lighting them up if they're not shown right :P). 

The shots are not edited in any way, just cropped and trimmed the edges. I don't like editing my pics. 


This is the inspiration for this photoshoot. This is a scene from both the OVA and the series. Episode 2 in the OVA and Episode 5 in the series.

Close enough.

The RG Sinanju's waist was really weak making posing difficult. The HG Unicorn was a tight build so posing wasn't an issue but as can be seen in the pics there are already areas where the LEDs stopped working. I might have broken a connection somewhere. Unfortunately, it's really hard to troubleshoot these kinds of issues once the kit was already fully assembled. Overall it was a very satisfying experience since I was able to get good shots. I'll have to do this more often.


Tuesday, January 24, 2017

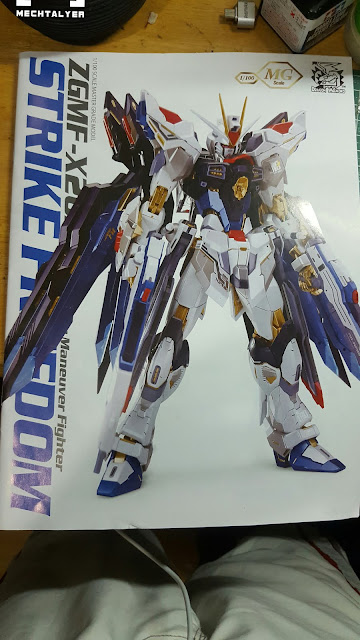
[WIP] Dragon Momoko MG Strike Freedom MB ver. WIP 1


Since most of my ongoing projects are on their final stages. I went ahead and started working on this.


Based from the unboxing review of the kit, most of the parts are under-gated, which is a good thing. 


Since most of the parts are under-gated, I decided to start painting them while still attached to runners. This makes painting similar colored parts easier since they are all still grouped together. This also helps me not to loose any parts before assembly.


Unfortunately, there isn't much part separation for most of the small details, Which means there will be a lot of masking and painting for the small details.


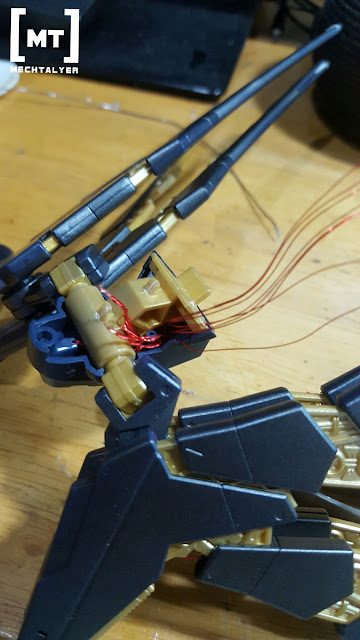
Since majority of the parts are painted, I've already started wring some of the parts, mainly the verniers throughout the kit. I'm still planning on adding lights in a few other places depending on how they will look on the final result.


One of the most notable "issue" with this kit is the gold color of the inner frame. A lot of people actually preferred Daban's plated gold but then there's the issue with nub marks.

Good thing there's Zurc Hobby Paints. They're a local custom paint supplier. I got to try one of their latest paints which is the hyper silver and I'm very impressed with the result. It's still far from the chrome plated look but really shiny silver right off the bottle. No sanding. No priming. No gloss undercoat. Just straight airbrushed and considering my beginner airbrushing skills and my DIY airbrush setup, I'm getting really satisfying results.


Here's some tests for the gold inner frame. The hand was painted with a light coat of Zurc's gold paint compared to a piece of the MG Phenex. It has that Matte gold finish similar to the MG Hyaku Shiki 2.0. It really looks good on pics but it's too light for my taste specially when seen in person.


Instead of laying gold paint over the silver, I tried clear yellow and I'm really liking the result. The brightness of the silver still pops out under the clear paint, almost giving it the plated look at a lesser degree. 

Hopefully by the next update I've finished working on the wiring and painting the inner frame. I expect that masking and detailing will take the most time so I'll try doing them bit by bit.

This kit will have a lot going and I'm not planning on finishing this any time soon. I'll be taking my time working on this so as not to mess anything up. This will test everything I know and can do in building Gunpla. And this will also be a good opportunity to learn and apply new things.

Monday, January 23, 2017

[Tutorial] Different types of stickers/decals 1

Today I'll be sharing a bit of information on how to differentiate the different types of decals or stickers that we get from our kits.

Stickers and decals that come with our kits are important as they give our kits added details. But it's based on personal preference on whether to use them and how much.

Here's a little flowchart on how to determine what type of sticker or decal you have.


Foil Stickers 


Generally, foil stickers are printed with a shiny, metallic finish in a silver background, albeit the term "foil". These stickers come pre-cut to make peeling them off the sticker sheet easier and make sure they fit the part where they go to.

This kind of sticker comes from almost all Gunpla grades and size

Clear Stickers


Clear stickers are like foil stickers. You peel them off from the sheet and stick them in your Gunpla. But unlike foil stickers that are printed on paper, clear stickers are printed on thin clear plastic. Clear stickers usually have a yellow back sheet. They're designed to look like actual decals.

Clear stickers usually comes from larger scale kits like MG's and PG's. But RG 1/144 kits have them also.

Dry Transfer Decals


Decals don't stick to parts like stickers do. Decals don't have a sticky backside that adheres to the part it is attached to. The markings are printed on the underside of the clear sheet and they have a white, almost like wax paper back sheet.  Dry transfer decals are also commonly called "dry rub" decals. To stick it to a part, pressure is applied in front of the decal so the markings "transfer" from the sheet onto the part.

Dry transfer decals usually come from MG and PG, usually 1/100 scales and bigger.

Water Slide Decals


Water slide decals require more effort than stickers or dry transfer decals. They can't be peeled off like stickers and instead of printed on a plastic sheet, They appear printed on a sheet of backing paper, commonly colored blue. They can either be pre-cut or not. Like the name suggests, it uses water to transfer the decal into the part itself. You have to wet the decal to loosen it from the backing paper then slide the decal onto the part.

Some MG and PG kits have water slide decals packed in them. Some models have their own water slide decals sold separately.

These are the common sticker/decals you would encounter in your Gunpla building career. Next time lets discuss how to apply them on our kits.

Friday, January 13, 2017

[REVIEW] My Airbrush Setup

Since I've finally started painting, might as well share with you what I use to paint my kits.


I'm currently using an cheap unbranded 0.3 mm gravity feed airbrush. For the Air compressor, I'm using 2 generic tire pumps with a 12v 5A power supply.


I'm using 2 pumps since 1 pump doesn't have enough pressure and that it pumps out air in pulses which is not good for airbrushing. With 2 pumps, I get around 25 psi with the airbrush pressed.

The fittings and hose came from a pet store in the aquarium section, These are what they normally use in aquarium pumps. Good thing they fit quite well to the airbrush and pump. 

To prevent the pumps overheating, I turn on the pump only when I'm about to spray on a piece. I use a DIY extension socket with a switch that I can press with my foot to better control the pump. I make sure to give the pumps some rest around every 30 mins to prevent overheating the pumps, and since I'm only able to work on painting for very short periods of time.


Even with this setup, I'm very satisfied with the results it gives. I know that this setup will not be able to achieve advanced effects. But this setup works well for basic painting.


As with other, regular air compressors, moisture buildup is an issue. This setup builds up moisture in the tubes quite quickly so you will get some splatter quite quickly.


To deal with that, I got a mini moisture trap to prevent water from mixing with the paint. I also got a quick release valve mo make removing the airbrush easier during cleaning and other stuff.


Though the moisture trap slightly dampened the pressure, It does a really good job of preventing the water from reaching the airbrush. That much water was just from around 15-20 minutes of running the air pump.


So far I'm really satisfied with the result this set up provides. I know I wouldn't be able to do much more than basic coats with this but I can see myself working with this setup for the foreseeable future.

Though I still suggest getting a proper airbrush setup. For the total price I've spent here, I might have been able to buy a proper basic air compressor. The air pumps cost me around 10 USD, the power supply cost around 13 USD, other stuff like hose and fittings cost around 5 USD. Still proper airbrushing equipment is a very good investment which will serve you well in the long run.

Monday, January 9, 2017

[WIP] MG Strike Freedom Gundam WIP 2

After all the happenings during the holidays and the busy work-life stuff out of the way, I've finally managed to get as much done enough for a blog update. 


It's been a long time since my last update so it's a good thing that I managed to do quite a lot in this project that it's almost nearing completion.

Backtracking to where I stopped from the last update, I continued painting the various parts while wiring up the frame.


I actually sawed slits in the chest vents to add to the light effects.


I was actually waiting for my ordered 1.8mm LEDs to arrive for use in the backpack but decided that the 0603 smd LEDs could still work. And they do work quite well.


Also, lighting up the head required 2 0603 smd LEDs to light up both the eyes and the forehead sensor. I could have used a different LED but I'm currently running low on my supply of LEDs since my order hasn't arrived yet.


I've also wanted to light up some sections of the wings to give the back view a better look.


Trying to hide the wiring as much as I can was a pain since I had to work with small pieces and pass the wires through some moving mechanisms.

Once I've finished painting enough major pieces, it's time to start putting them together.


Luckily the waist area has enough space to pass the wiring. It only needed minimal drilling to get the wires around.


And now the main body is put together and the wiring combines.


After the main body, it's time to put the backpack on. The backpack had the most LEDs in the kit. Good thing there where enough space in the areas we needed to handle all the wiring.


Once all the wires parts are put together, it's really good to see them all lit up. 

I noticed that some of the wing tips have lesser light than the others. This could be due to the LED coming from a different source/ batch than the other LEDs. It just sucks that they aren't noticeable during initial test but look a bit too obvious when seen with the other parts. If it gets to me I may try replacing those once I get to restock my LEDs.


I originally planned to have this displayed with the wings opened. Unfortunately I may have under estimated the placement of the holes in some moving sections of the wings as that is as much as I can open them. I guess I'll have to find another pose for this.

With all the LED wiring done and most of the kit assembled, I'll just have to finish painting a few minor parts then some panel lining and decals will finally complete this project.

Welcome

Welcome to MechTalyer. My personal space for everything Gunpla.

Search

Popular Posts

Followers

Categories

1/100 (5) 100 (7) 144 (10) 2017 (4) air compressor (2) airbrush (6) amazing red warrior (2) anubis (1) avalanche (1) bandai (9) barbatos (1) base (5) blog (1) bsc (1) community (2) completed (1) conversion (2) custom (18) daban (3) decals (1) destiny (1) display (7) dragon momoko (10) event (1) exia (4) expo (2) flying base r (1) geirail (1) GMKC (2) guide (1) gundam (21) gunpla (24) gunpla builders den (2) haro (1) hazel custom (1) hg (8) hobby (11) IBO (1) jesta cannon (1) kamil (30) kotobukiya (1) led (38) led unit (1) magic toys (1) master grade (11) meetup (1) metal build (5) MG (25) mod (25) monoeye (1) nu (4) others (2) paint (7) pearl gloss (1) peg (1) phenex (4) philippines (4) qan[t] (2) random (7) review (15) RG (6) rx78 (2) setup (1) shia (2) sinanju (1) site (1) star build strike (2) stickers (1) strike freedom (8) tthongli (2) tutorial (6) unicorn (5) upgrade (1) vintage (2) wing expansion effect (1) wing zero custom (1) wip (36) zaku (2) zaku 2 (3)

Statistics

Powered by Blogger.